
Tile Floor Demolition: The Complete Scope Explained
TL;DR: Tile floor demolition covers four distinct phases: the tile surface removal, thinset or mortar cleanup, subfloor inspection, and debris haul-away. Each phase generates its own dust and debris management requirements, and a quote that only covers the first phase is a partial-scope quote, not a complete tile floor demolition service.

Key Takeaways
Tile floor demolition is not one step. It is a four-phase process: tile surface removal, thinset or adhesive cleanup, subfloor or slab inspection, and debris haul-away, each with its own equipment and dust requirements.
The thinset cleanup phase generates as much or more silica dust as the tile removal phase, because grinding cured mortar off a concrete slab is a silica-intensive operation in its own right.
Tile floor demolition in occupied homes requires source-capture dust control throughout all four phases, not just during tile removal, since thinset grinding and debris collection both produce airborne particulate.
Material type determines the difficulty of each phase: ceramic and porcelain have different tile removal demands, but both require comparable thinset cleanup; Saltillo has the greatest mortar volume; VCT has mastic instead of thinset.
A finished tile floor demolition delivers a subfloor that is flat, clean, and ready for the installation crew to start work immediately, with no intermediate cleaning or prep step required between demo and install.
Tile floor demolition is a term that gets used as a shorthand for the whole scope of work involved in taking an existing tile floor from installed to removed and ready for new flooring. In practice, the scope involves more phases than the term implies, and each phase has its own tools, dust profile, and completion criteria that the next phase depends on.
Understanding what tile floor demolition actually covers helps homeowners and contractors ask the right questions before booking, compare quotes accurately, and avoid the common scenario of discovering mid-project that a low quote only covered one or two of the four required phases. DustFree PNW's dust-free tile removal service covers the full scope described here across Central Oregon.
The Four Stages of a Complete Tile Floor Demolition

Stage | What It Involves | Dust Generated | Often Excluded From Base Quotes? |
1. Tile surface removal | Chipping and lifting the tile layer; collecting broken fragments | High silica dust from tile fracture | Rarely — usually included |
2. Thinset or adhesive cleanup | Grinding or scraping mortar residue from the subfloor surface | High silica dust from concrete and mortar grinding | Frequently excluded — confirm before booking |
3. Subfloor inspection | Checking for cracks, high spots, moisture damage, and levelness | None | Sometimes informal; rarely documented |
4. Debris haul-away | Collecting and removing all tile fragments, mortar pieces, and dust from the property | Low, but dust disturbed during collection | Sometimes excluded or billed separately |
Most tile floor demolition quotes include stage one and assume stage four. Stage two, thinset or adhesive cleanup, is the most frequently excluded phase and the most frequently disputed line item on final invoices. Stage three, subfloor inspection, is often performed informally without documentation, which becomes a problem if hidden subfloor conditions are discovered after the new flooring is already installed.
Stage One: Tile Surface Removal
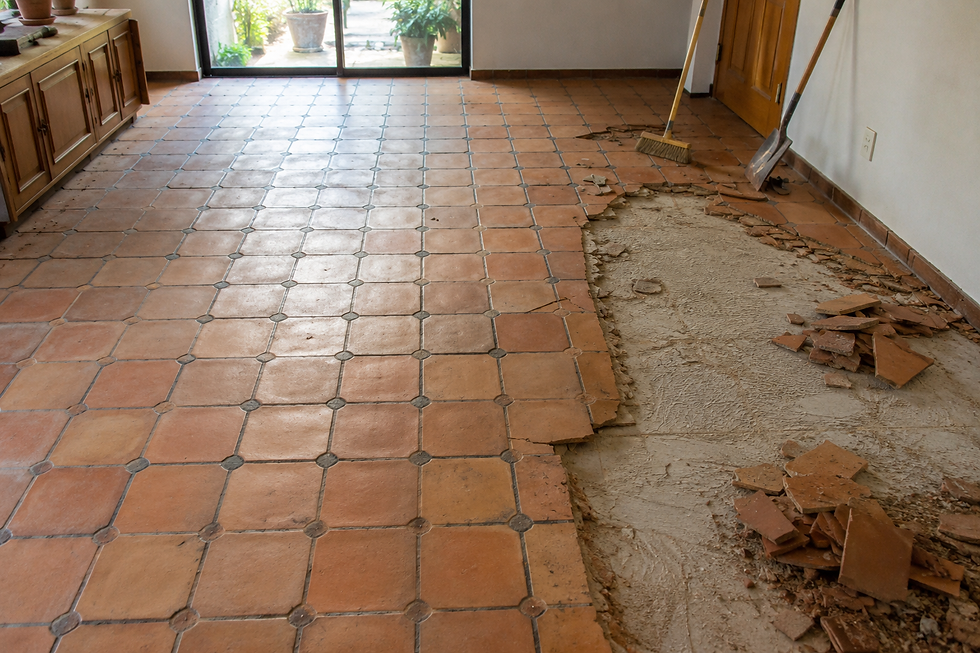
Tile removal starts by breaking the bond between the tile and the substrate below it. For most ceramic and porcelain tile over concrete, this involves a chisel or demo tool working along grout lines to wedge under the tile and lift it in sections. The tile fragments are collected and staged for debris removal. This phase generates the first wave of silica dust from tile fracture and grout breakdown.
Source-capture equipment collects dust directly at the chisel head before it becomes airborne. This is the key difference between traditional demolition and professional dust-free floor removal. Conventional methods allow fine dust to spread throughout the room and enter the HVAC system during the initial removal stage, while source-capture technology contains dust at the tool’s contact point to help maintain cleaner indoor air and surrounding surfaces.
Stage Two: Thinset and Adhesive Cleanup
Once the tile surface is up, a layer of thinset mortar, mastic, or adhesive remains bonded to the concrete slab or wood subfloor. This layer must come off completely before new flooring can be installed. Thinset that has cured fully against a concrete slab for years requires diamond grinding equipment to remove cleanly, not scraping alone.
This stage generates as much or more silica dust as the tile removal stage, because diamond grinding on concrete is a high-particulate operation that contacts both the mortar and the concrete surface beneath it. Without source-capture control during the grinding phase, this dust spreads through the work zone the same way tile removal dust does. DustFree PNW's thinset removal service covers this phase specifically on jobs where the mortar layer is the primary remaining challenge after tile is up.
Stage Three: Subfloor Inspection
The subfloor inspection after tile and thinset removal is the first opportunity to see the condition of the slab or wood subfloor without the masking effect of the old adhesive layer. Hidden conditions including moisture staining, cracks, soft spots in plywood subfloors, and surface irregularities that would affect new flooring installation are all visible at this stage and invisible afterward once new flooring is installed over them.
A professional demo crew should document any conditions that need attention and communicate them to the homeowner or project manager before leaving the site. This communication protects everyone: the homeowner knows the full scope of what was found, and the installer who follows has accurate information about the substrate condition before their work begins.
Stage Four: Debris Haul-Away
Tile floor demolition generates significant debris by volume and weight. Ceramic tile alone weighs several pounds per square foot, meaning a 200-square-foot room produces hundreds of pounds of tile fragments, mortar pieces, and grout. All of this material must leave the property before the space is ready for new flooring. Debris haul-away is sometimes included in base quotes and sometimes billed per load as a separate item. Confirm which applies before booking.
What a Finished Tile Floor Demolition Looks Like
A complete tile floor demolition delivers a subfloor or slab that is flat, clean of all tile fragments and adhesive residue, inspected and documented for condition, and free of debris. The installation crew should be able to walk in and begin their work without an additional cleaning or prep step between the demo and the install.

DustFree PNW covers the complete tile floor demolition scope across our Central Oregon service areas. You can review our work and read verified reviews on our Google Business Profile, or get a free quote for your tile demolition project.
Final Thoughts
Tile floor demolition is a complete scope job with four distinct phases, each of which contributes to whether the installation crew that follows can start on schedule or needs additional prep work. A quote that covers all four phases with source-capture dust control throughout is the scope that delivers a finished result without renegotiation mid-project. Get a free quote from DustFree PNW.
FAQ
What does tile floor demolition include?
A complete tile floor demolition includes four phases: tile surface removal, thinset or adhesive cleanup, subfloor inspection for hidden conditions, and debris haul-away from the property.
Is thinset removal always included in a tile floor demolition quote?
No. Thinset cleanup is one of the most frequently excluded items in base tile demolition quotes. Always confirm in writing whether mortar or adhesive removal is included before booking.
How much silica dust does tile floor demolition generate?
Significant amounts across all phases. Tile fracture, thinset grinding, and debris collection all generate silica particulate. Source-capture equipment is needed throughout all phases, not just during initial tile removal.
What is the subfloor inspection step in tile floor demolition?
Once tile and thinset are removed, the subfloor is inspected for moisture damage, cracks, soft spots, and surface irregularities that affect new flooring installation. Any conditions found should be documented and communicated before the crew leaves the site.
Does tile floor demolition include debris removal?
It should, but not always. Debris haul-away is sometimes included and sometimes billed separately. Tile and mortar debris is heavy and must leave the property before new flooring can be installed, so confirm this is in scope before booking.
Does DustFree PNW provide complete tile floor demolition in Central Oregon?
Yes. DustFree PNW handles all four phases of tile floor demolition using professional source-capture equipment throughout Central Oregon. Contact us for a free quote.


Comments