
DIY Tile Removal: When It Makes Sense and When It Does Not
TL;DR: DIY tile removal makes sense for small, isolated repair jobs where the area is limited, the home is unoccupied during the work, and proper respiratory protection is in place. For large floor areas in occupied homes, the silica dust risk, subfloor prep demands, and timeline compared to professional crews change the calculation in ways most homeowners do not factor in before they start.

Key Takeaways
DIY tile removal for small areas of a few tiles or a small bathroom can be done safely with the right PPE and dust management, though it is still physically demanding work that takes longer than most people expect.
For large floor areas, DIY tile removal typically takes three to five times longer than a professional crew, generates silica dust that spreads through the home, and often leaves a subfloor that needs additional prep before an installation crew can begin.
The primary risk in DIY tile removal is not the physical effort but the silica dust exposure in an occupied home without source-capture equipment, which cannot be adequately managed with a shop vac, plastic sheeting, or a standard dust mask alone.
Hidden costs of DIY tile removal include HVAC duct cleaning after dust contamination, extended cleaning costs, subfloor repair from gouging the slab with improper tools, and installation delays from a subfloor that is not flat enough for the installer to start.
The break-even point where professional removal costs less than DIY, when all factors are included, is lower than most homeowners estimate before starting a project.
The idea of doing your own tile removal is appealing from a budget perspective. You are removing something, not building anything, so how hard can it be? The tools look straightforward. The process looks repetitive. The savings look meaningful. What most homeowners discover partway through a DIY tile removal project is that the physical demands are much higher than expected, the dust is much worse than expected, and the subfloor that results from DIY removal often needs additional professional attention before new flooring can go down.
This article is not designed to talk anyone out of DIY tile removal across the board. There are situations where it makes sense. It is designed to help homeowners and contractors make an informed decision about which situations those are. DustFree PNW's dust-free tile removal service serves Central Oregon homeowners who have gone through this calculation and decided professional removal is the right choice for their project.
When DIY Tile Removal Makes Sense
Small-scale tile removal for individual tile replacement or localized repair, where only a few tiles are being removed and the surrounding area is intact, is manageable for a careful homeowner with the right tools and PPE. The dust volume is limited, the physical demands are proportional to the small area, and the subfloor impact is contained.
For a few tiles in a bathroom repair scenario, a sharp chisel, a hammer, proper eye and respiratory protection, and a shop vac positioned nearby will handle the job without contaminating the whole home. This is the type of small-scope project where DIY is a legitimate option.
The Silica Dust Problem With DIY Tile Removal
The moment a DIY tile removal project scales beyond a few tiles to a room-sized floor area, silica dust becomes the primary concern that changes the risk calculation. A standard 200-square-foot tile floor removal can release up to one pound of crystalline silica dust per square foot using traditional methods, totaling hundreds of pounds of hazardous particulate generated in an occupied home.

DIY Dust Control Approach | What It Captures | What It Misses | HVAC Contamination Risk |
Plastic sheeting over doorways | Some coarser particles | Fine silica, which passes through gaps | High — fine particles still reach returns |
Standard N95 respirator | Protects the worker | Does nothing for home surfaces or HVAC | High — home still contaminated |
Shop vac positioned nearby | Some dust after it is already airborne | Fine particles that are small enough to bypass the filter | Moderate to high |
Wetting the tile surface during removal | Some dust suppression at the immediate surface | Silica from thinset grinding afterward | Moderate, but grinding phase remains |
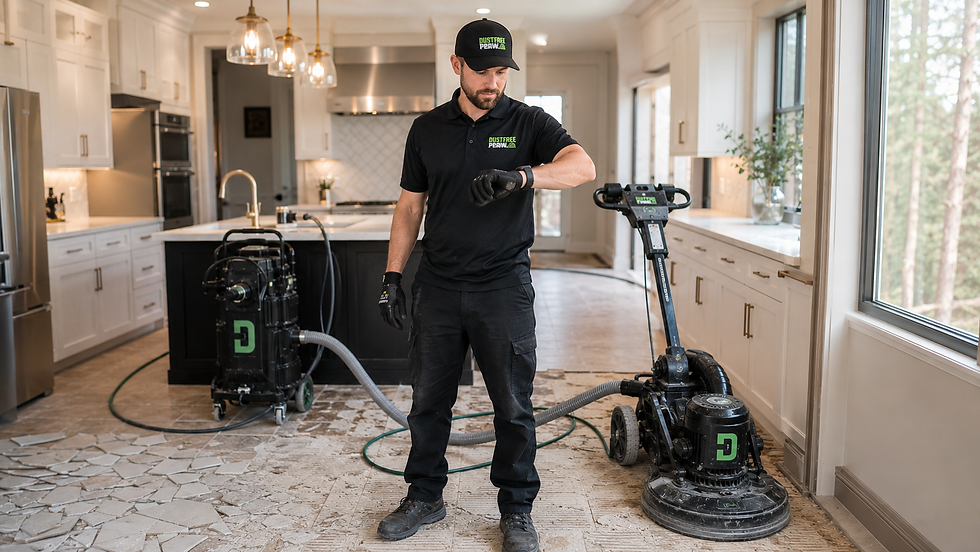
Professional source-capture equipment | Dust captured at tool before airborne | Minimal escape | Minimal |
The common DIY dust control recommendations, plastic sheeting and a shop vac, reduce visible dust but do not prevent fine silica particles from reaching HVAC returns and spreading through the home. Standard home furnace filters capture large particles; fine silica that stays airborne for hours passes through most residential filter grades. The result is dust that settles in cabinet interiors, on countertops, in bedding, and in the ductwork weeks after the visible cleanup appears complete.
The Hidden Costs That Change the DIY Calculation
The most common DIY tile removal mistake is calculating only the surface savings (no labor cost) without accounting for the secondary costs that often follow:
HVAC duct cleaning after silica contamination typically runs several hundred dollars and is sometimes required before an HVAC technician will certify the system after a dusty tile removal project. Deep cleaning of surfaces, cabinets, and belongings that settled silica dust touches adds time and cost. Subfloor repair from gouging the concrete slab with improper tools or aggressive techniques adds scope before the installation crew can begin. Installation delays caused by a subfloor that is not flat enough for new tile or flooring create scheduling problems that push back every trade that follows.
A professional crew completing the same job in a single day with source-capture equipment produces a clean home, a flat installation-ready subfloor, and zero duct cleaning or extended cleanup requirements. The labor cost difference narrows significantly when these secondary costs are factored in.
Timeline: DIY vs Professional Tile Removal
Most residential tile removal projects that a professional crew completes in a single day take a homeowner working alone one to two weekends. This is not a criticism of DIY effort; it is a reflection of the difference in equipment and physical stamina across a full day of chiseling. A 200-square-foot kitchen tile floor typically takes a professional crew three to six hours including thinset cleanup. The same job as a DIY project typically takes two to four days spread across multiple sessions, with sore joints and an unfinished subfloor requiring additional work before installation can begin.
What Professional Tile Removal Delivers That DIY Typically Does Not
Professional tile removal with source-capture equipment delivers a clean home environment during and after the job, a flat subfloor that meets the installation crew's flatness requirements on the same day, and no residual silica dust in the HVAC system or on home surfaces. These outcomes are achievable by a homeowner doing their own removal, but not without source-capture equipment that is not available for rent at standard tool rental outlets.

DustFree PNW serves homeowners across our Central Oregon service areas who have made the informed choice that professional removal is right for their project. You can review our work on our Google Business Profile or get a free quote to compare the real cost of professional removal against the full cost of DIY.
Final Thoughts
DIY tile removal is a legitimate choice for small repair jobs. For large floor areas in occupied homes with families, pets, HVAC systems, and installation timelines to manage, the full cost comparison including dust cleanup, potential HVAC servicing, subfloor repair, and timeline impact makes professional removal the lower-risk and often lower-total-cost option. Get a free quote from DustFree PNW.
FAQ
Can I remove tile myself?
Yes, for small repair jobs of a few tiles with proper respiratory protection. For large floor areas in occupied homes, the silica dust risk and the gap between DIY results and professional results typically change the calculation.
What is the biggest risk of DIY tile removal?
Silica dust exposure in an occupied home. DIY dust control methods like plastic sheeting and shop vacs do not prevent fine silica particles from reaching HVAC systems and spreading through the home.
How long does DIY tile removal take compared to a professional?
A professional crew completes most residential rooms in a single day. The same job as a DIY project typically takes one to two weekends, with a subfloor that often needs additional grinding before an installation crew can begin.
What are the hidden costs of DIY tile removal?
HVAC duct cleaning after dust contamination, extended deep cleaning of home surfaces and cabinets, subfloor repair from improper tool use, and installation delays from a subfloor that is not flat enough for the installer.
Can I rent source-capture tile removal equipment?
Professional source-capture equipment for dust-free floor removal is not commonly available at standard tool rental stores. These specialized systems are typically used by experienced flooring removal contractors and are designed to capture dust directly at the point of removal. Because comparable dust-control equipment is difficult for homeowners to rent, DIY floor removal often cannot achieve the same level of dust containment, indoor air protection, and cleanup as professional service.
Does DustFree PNW offer an alternative to DIY tile removal in Central Oregon?
Yes. DustFree PNW provides professional source-capture tile removal throughout Central Oregon, using advanced dust-control equipment to capture debris at the point of removal. Most projects are completed in a single day, leaving behind a clean, smooth, installation-ready subfloor for the next phase of your flooring project. Contact us for a free quote to compare.

Comments