
Backsplash Removal: How to Do It Without Wrecking Your Walls
TL;DR: Backsplash tile removal is more controlled than floor tile demo, but the wall behind it is far more vulnerable than a concrete slab. The drywall or cement board that backsplash tile is bonded to can tear, crack, or come off in chunks if the tile is pried without scoring the grout lines first. The adhesive type, the wall substrate, and how the electrical area is prepared all determine how cleanly the wall comes out of the process.

Key Takeaways
Backsplash tile bonds to drywall or cement board with thinset or mastic, and pulling tile before scoring the grout weakens that bond between tile and wall rather than between tile and substrate, which causes drywall damage.
Electrical shutoff is required before any backsplash removal begins, since outlets and switches are embedded in the backsplash area on most kitchen walls.
Thinset is harder to remove from drywall than mastic and often requires oscillating tools with carbide attachments rather than scraping alone.
Drywall behind backsplash tile frequently needs patching or full replacement after removal, which is a normal part of the scope, not a sign that the removal was done incorrectly.
Dust during backsplash removal is lower than floor tile demo but still present from tile, grout, and thinset, and it spreads quickly in the enclosed kitchen environment.
Backsplash removal is one of the first demo steps in a kitchen remodel or countertop update, and it is the tile removal task where wall damage is most likely to happen when the process is rushed. Unlike floor tile, which is bonded to a concrete or wood subfloor that can absorb aggressive removal, backsplash tile is bonded to drywall or cement board that tears easily when tiles are pried without proper preparation.
DustFree PNW's dust-free tile removal service covers backsplash removal as part of kitchen and bathroom remodel prep across Central Oregon. Here is what the process looks like at each stage and what determines how much wall repair is needed after the tile comes down.
Step One: Electrical Shutoff and Surface Protection
Before any backsplash tile comes off, power to all outlets and switches in the work area has to be shut off at the breaker. Outlet covers and switch plates should be removed and stored for reinstallation after the new backsplash is up. This step is not optional. Backsplash tile often runs directly up to and around electrical boxes, and chiseling near live outlets creates a hazard that no demo efficiency gain is worth.
Countertops and appliances directly below the backsplash area should be covered with cardboard or drop cloths. Backsplash tiles pop loose and fragment during removal, and anything on the counter below takes the impact if the surface is not protected.
Why Grout Scoring Comes Before Any Tile Comes Off
The most common mistake in DIY backsplash removal is going straight to the pry bar without scoring the grout lines first. Grout lines hold adjacent tiles together as a system. When a pry bar forces one tile loose without releasing the grout joints, the force transfers to the adjacent tiles and to the drywall behind the one being removed, causing tears in the drywall paper and chunks of substrate to come off with the tile.
Approach | Grout Scoring First? | Wall Damage Risk | Adhesive Residue After |
Straight pry bar, no scoring | No | High — drywall tears with tile | Variable — often takes drywall paper with it |
Score grout lines, then pry | Yes | Low to medium | Thinset or mastic stays on wall, requires scraping |
Score grout, start at exposed edge | Yes | Lowest | Cleanest release; adhesive still requires removal |
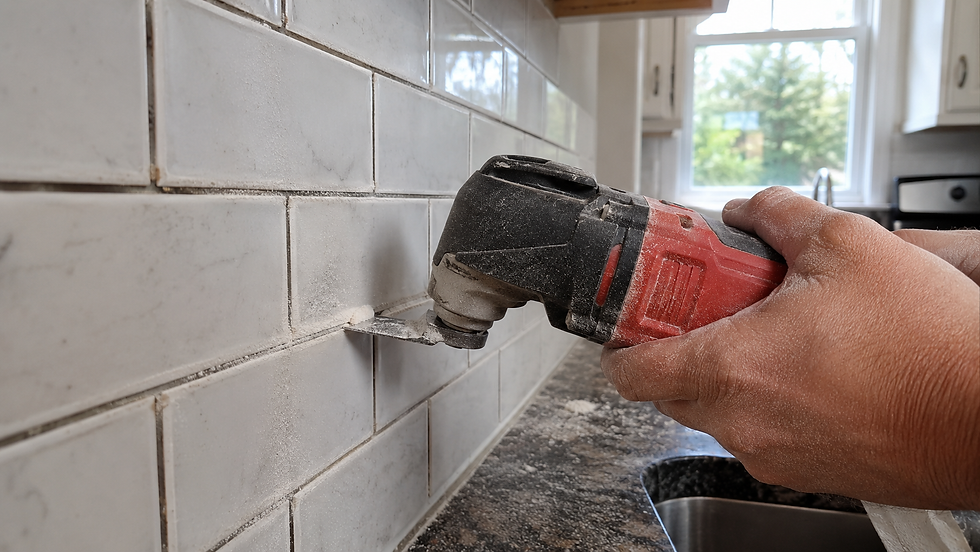
An oscillating multi-tool with a grout blade is the most controlled tool for scoring, since it cuts into the grout joint at a precise depth without creating impact force on the surrounding tiles. Once grout joints are scored all the way around a tile, a thin putty knife or pry bar can release it at a low angle without pulling drywall along with it.
Thinset vs Mastic: What the Adhesive Means for Removal
Kitchen backsplash tile is installed with one of two adhesives: thinset mortar or mastic. These behave very differently during and after removal.
Thinset is cement-based and cures hard. It does not dissolve with solvents or heat, which means removal requires mechanical scraping with stiff putty knives or an oscillating tool with a carbide rasp attachment. Thinset on drywall is painstaking to remove without damaging the drywall paper beneath it, which is why patches are often needed after thinset-bonded backsplash removal.
Mastic is a flexible adhesive that can be softened with heat or sanded down. It is somewhat easier to remove from wall surfaces than thinset but can leave a residue that needs to be fully cleaned before new tile adhesive will bond correctly.
What to Expect on the Wall After Backsplash Tile Is Removed
Even on a carefully executed backsplash removal, some adhesive residue, torn drywall paper, and small gouges are normal and expected. The drywall paper layer is thin and bonds to the back of tile over years of installation. Any adhesive that has penetrated the paper layer creates a near-inseparable bond at that point, and separating the tile from it typically tears the paper rather than releasing it cleanly.
This is not a failure of the removal process. It is a known and predictable consequence of bonded tile on drywall, and it is why most kitchen backsplash remodels include a drywall patching or skim coat step between tile removal and new tile installation. In cases where drywall damage is extensive, a full section replacement may be the faster and more cost-effective approach than patching individual areas.
What a Clean Backsplash Removal Leaves Behind
A complete backsplash removal leaves the wall free of all tile, with adhesive residue scraped back and any drywall damage assessed and communicated to the homeowner or project manager. The wall does not need to be perfect at the end of demo. It needs to be clean enough for the installation crew to skim, patch, and prime before new tile goes up without surprises mid-install.

All tile fragments and debris should be hauled from the property as part of the completed scope. DustFree PNW covers backsplash and tile removal across our Central Oregon service areas. You can review our work on our Google Business Profile or get a free quote for your kitchen remodel demo.
Final Thoughts
Backsplash removal done carefully leaves a wall that needs minor patching and a day of drywall work before new tile goes up. Done without grout scoring or electrical prep, it can create several days of repair work before the installation can even start. The process is methodical, not fast, and the difference between careful removal and rushed removal shows immediately in how much wall repair the next crew has to deal with. Get a free quote from DustFree PNW.
FAQ
What is the most important step in backsplash tile removal?
Scoring the grout lines with an oscillating tool before prying. Skipping this step transfers removal force to the drywall behind the tile, causing tears and chunks to come off with the tile.
Does backsplash removal always damage the drywall?
Some minor drywall damage is common and expected, particularly where thinset has bonded to the drywall paper over years. Full drywall damage is more likely when tiles are pried without scoring the grout first.
Do I need to turn off electricity before removing a backsplash?
Yes. Shutting off power to the backsplash area at the breaker is required before any removal begins, since outlets and switches are embedded in the work zone.
What is the difference between thinset and mastic for backsplash removal?
Thinset is cement-based and must be scraped mechanically. Mastic can be softened with heat or sanded. Both leave residue on the wall that must be cleaned before new tile can be installed.
Is backsplash removal dusty?
Less so than floor tile, but yes. Tile, grout, and thinset dust are still generated during removal and spread through the kitchen environment. Source-capture equipment controls this more effectively than plastic sheeting alone.
Does DustFree PNW do backsplash removal in Central Oregon?
Yes. DustFree PNW handles backsplash and wall tile removal as part of kitchen and bathroom remodel prep across Central Oregon. Contact us for a free quote.


Comments